SCENE 9 - FLIGHT FROM THE MAGIC LAND
Location: Magicant, Crystal Cavern, South Merrysville
Maps: Map 1, Map 2, Map 3, Map 4
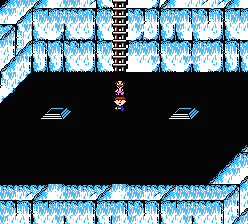
| After you've seen all there is to see in Magicant, walk into the main area populated with foes and head east. Over a bridge, you'll find a collection of wells. By walking into the one pictured, you'll descend into a cavernous area. |

|
| Ahead lie two escape routes. These will each yield a similar cavern, with endpoints here and there making for a maze-like area. If you follow the paths Right, Left, Left, Right, you'll emerge into a final area much larger than the previous caves. The Japanese version has a more maze-like structure, however, so if you're playing that, be ready to face a long chain of passages. |
|
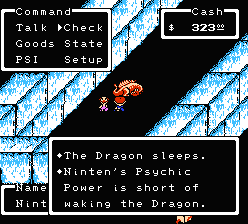
| The final area of the Crystal Cavern is fairly straightforward -- just follow the path as it winds around. In the center, however, you'll see a large sleeping dragon. If you check it out, it'll just say that you need to be stronger to even affect the beast, meaning that you'll be making a return trip later on when you're much higher levelled. |
|
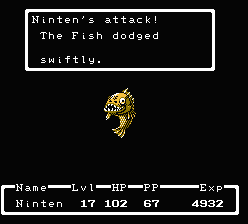
| There's one last route downward here near the end of the path. If you walk over it, a boss battle will begin. The Fish guarding the passage can hit hard, but with your Boomerang and new armor, you should be fine. Inside the passage it guarded is the magical Onyx Hook, an item that will instantly teleport you back to the center of Magicant whenever it's used. This can really help in a pinch. |
|
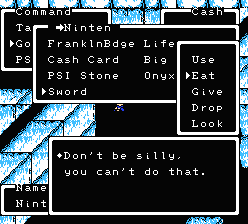
| If you pick up all the items along the way, you'll be the proud owner of a new Sword. While you can't equip it yourself, you ought to hang onto it -- it'll prove to be an exceptionally powerful item later on. Teleport back to Magicant with your Onyx Hook and store it if you want more inventory space. |
|
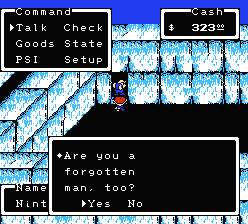
| After a winding passage, you'll find a lone man guarding the exit. He'll explain his troubles to you and wish for no sympathy. Answer No, then Yes to his questions to pass, but if you answer otherwise, you must listen to his long rant again. NOTE: If you're playing the Japanese version, answering a question wrong will teleport you back to the beginning of the caverns. Beware! |
|
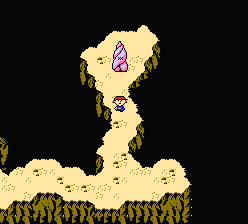
| When you exit, you'll find yourself standing in front of an XX Stone, just like the place you initially teleported to Magicant, but in a different cave. Exit the cave and heal up if your HP is low -- some of the foes in the next part can be fierce. |
|
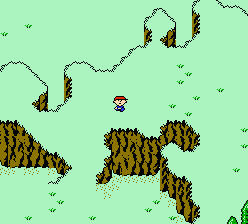
| Outside, work your way north from the cave. The platform you're on doesn't have any tricky parts to it, though at the end, it makes a curve left (as shown). Walk around the cliff and north once more to find yourself almost immediately in the next town. |
|
ITEMS LOCATED HERE:
|
|
Description: When you are tired or injured, use it. | |
|
Buy Price: $30 Sell Price: $15 |
HP Recovered: ~30 HP
|
|
|
|
Description: As long as you have it, you can warp back to Magicant. | |
|
Buy Price: $Not For Sale Sell Price: $0 |
|
|
|
|
Description: Few people can master it. | |
|
Buy Price: $Not For Sale Sell Price: $0 |
Fight +46
|
|
ENEMIES LOCATED HERE:
 Barbot |
Description: Is it a malnourished robot? | ||||
|
|
||||
 Bear |
Description: Somebody ate his porridge, and he isn't too happy about it! | ||||
|
|
||||
 Cougar |
Description: It is quite different than a pet cat. | ||||
|
|
||||
 Dadseyes |
Description: Watch your step: Dadseyes are everywhere. | ||||
|
|
||||
 Eagle |
Description: Its quickness is the source for its pride. | ||||
|
|
||||
 Foureyes |
Description: It's the optometrists favorite! | ||||
|
|
||||
 Groucho |
Description: If he was a mask, someone might mistake your identity! | ||||
|
|
||||
 Lil' Saucer |
Description: It's only as big as a dinner plate. | ||||
|
|
||||
 Momseyes |
Description: Momseyes will spot you for sure! | ||||
|
|
||||
 Skunk |
Description: Hold your nose! | ||||
|
|
||||
 Ullrich |
Description: This thing could not occur naturally. | ||||
|
|
||||
 Watcher |
Description: This enemy's face is the easiest to draw. | ||||
|
|
||||
 Wolf |
Description: Watch out for those pearly whites! | ||||
|
|
||||
BOSSES LOCATED HERE:
 Fish |
Description: It seems to be guarding something. | ||||
|
|
||||
Queen Mary's Castle | Walkthrough Top | Merrysville