|
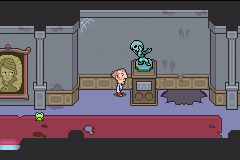
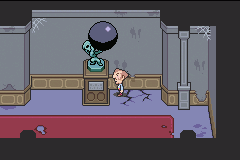
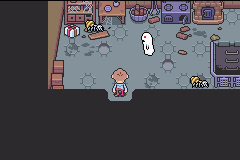
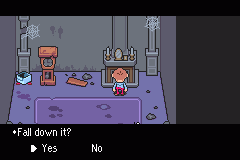
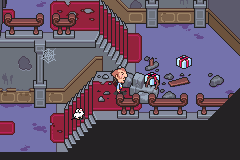
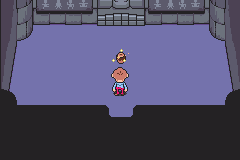
Once you're inside the castle, there'll be a door to your left that leads to a gift box and a dead end. It may look like you're stuck, but go back to the first room and dash into the big statue. The big metal ball will fall off and create a giant hole that you can jump down into.
|
|
|
 If you dash into the statue from the right side, the ball will fall on you and KERSPLAT! GAME OVER!
|
|
|
|
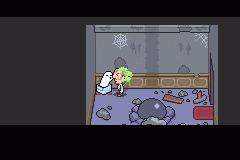
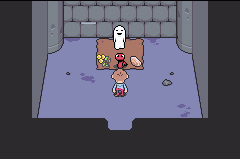
Go down the hole, and you'll be in a tiny room. Check the wall to build a Wall Staple ladder back up if you want. If you check the gift box, a ghost will pop out and burp on you, making you sick. You're unable to eat food when you're sick, so use the Fresh Mint in the next room to cure it ASAP.
|
|
|
|
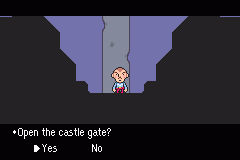
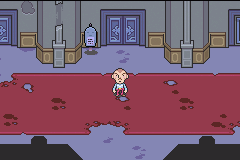
Keep going, and you'll find yourself in a big, empty room with a door to the north, south, east, and west. Check the south one to unlock the main castle door.
|
|
|
|
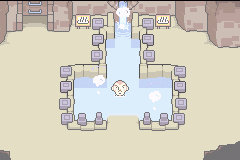
Now go into the west room. You'll find a save frog, a gift box with a Fresh Mint in it, and stairs going down. Go down them and you'll find a hot spring. Think of this area as a sort of safe haven; if you get into trouble, this is where you want to go.
|
|
|
|
Save, return to the main foyer, and go north this time. You'll be in a room with 3 doors facing you and one door to your left. There will also be some ghosts. They can be tough at first, so be careful or just avoid them altogether.
|
|
|
|
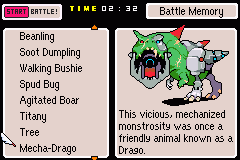
The top left room will have two Arachnid! enemies and a lone gift box. Open the box to get the Battle Memory, which is a very cool and useful item. Use it (it's in your key items menu) to practice fighting any enemy you've met before. The enemy won't fight back, and will have infinite HP. Select "Quit" when you're done practicing.
|
|
|
|
In the top middle room is the Ghost Bazaar. Get a Rotten Eclair from a Smelly Ghost, then come here and trade it for the red Rope Snake. You'll need it to progress through the castle. You can also trade one eclair for a Fresh Mint, or two for some Beef Jerky.
|
|
|
|
You can avoid the top right room for now if you want. All you'll find in there for now are a few enemies, a few gift boxes, and stairs that lead to an eventual dead-end.
|
|
|
|
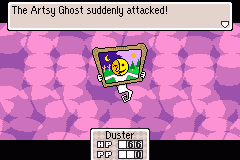
Now go through the door on the left side of the ghost room. It's easy to overlook, so be careful. Anyway, continue on and you'll come to a door at the start of a hallway. Go in and get the Chick Bandana. And watch out for that Artsy Ghost!
|
|
|
|
All the fireplaces in the castle connect to the fireplace by the first-floor hot spring, so check any fireplace to instantly return there. Just realize that the fireplaces only go one way.
|
|
|
|
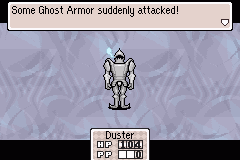
Go back outside the Artsy Ghost room and into the hallway. Some of the suits of armor here are possessed! Watch out! Luckily their music is easy to music combo to, but if things get rough, it's okay to run.
|
|
|
|
You'll soon reach a room with ghosts having a jolly good time. The door on the far right will lead to a room with gift boxes you can't reach yet. You'll be able to reach them soon, though.
|
|
|
|
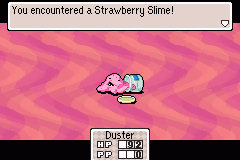
The bottom right door leads to the kitchen. Here, you'll find a map of the castle, some Violent Roaches, some nice ghosts, and a strange enemy: the Strawberry Slime. Defeat it for some good experience, but be warned that it's quite a bit stronger than it looks.
|
|
|
|
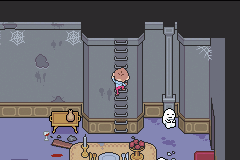
Back in the party room, check the wall to build a Wall Staple ladder to the next floor.
|
|
|
|
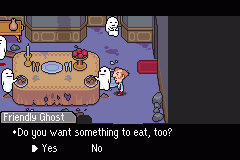
A ghost on the right-hand side of the party room will give you a free Rotten Eclair, but you have to answer right. Say "No" if you already have a Rotten Eclair, but say "Yes" if you have none. You'll get a free one if you do this! Then go upstairs and talk to the ghost near the ladder. Give him an eclair, and you'll get a Beef Jerky in exchange. Repeat for lots of free jerky!
|
|
|
|
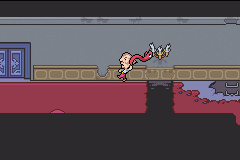
Go west a tiny bit and you'll see that you need to use the Rope Snake to cross the gap in the floor. Press the A Button while near the candlestick on the wall and you'll swing across.
|
|
|
|
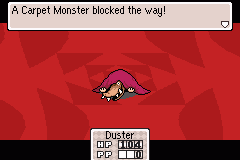
There's a Carpet Monster hiding underneath the rug right where you make your landing. Don't worry, your fancy kicking moves should take him down easily.
|
|
|
|
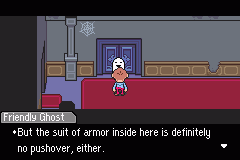
There's a ghost in front of a door here, but save your game in the room to the left first. Return to the ghost and talk to him. He'll tell you there's a powerful enemy in the room behind him. Some Durable Shoes are waiting in there as well. Grab the shoes, and if you want, go ahead and fight the monster(s). The fight is optional.
|
|
|
|
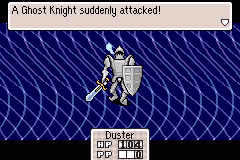
If you like, you can fight the terrible monster the ghost warned you about. There are two ways to fight the Phantom Knight. Choose to fight the Phantom Sword and Shield separately. Afterwards, approach the Phantom Armor and fight him without his weapons. Or, you can approach the armor first and fight the Phantom Knight in his full gear. Doing so he will have the sword and shield in hand and be slightly harder.
|
|
|
|
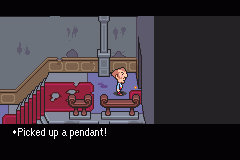
Go up to the fourth and final floor. You'll come across a shining pendant on the ground. Take it and keep moving forward. The next hallway has some Rockin' Ghosts which you can chose to ignore, if you can sneak past them.
|
|
|
|
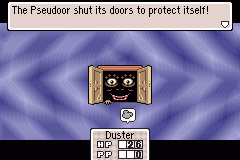
The next hallway is full of doors guarded by Barrelmen. All of the doors are Psuedoors except the one at the very end. Before you enter this door, prepare yourself. Make sure that Duster's HP is full and that you have plenty of Beef Jerky. And, just to be safe, you can go back downstairs and save.
|
|
|
|
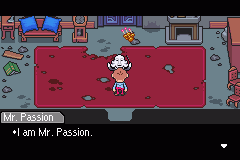
Inside the room, you'll find a ghostly conductor named Mr. Passion. Interrupt him, and answer no to his question. This will anger him so much he'll attack you.
|
|
|
|
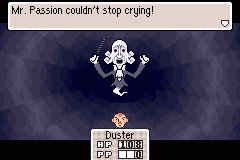
This will be a difficult fight. Start by using the Smoke Bomb technique to make him cry. This will make him miss often. Lower his stats and use any bombs you might have. Attack normally otherwise. Use Beef Jerky when you need it. Keep this up and he'll eventually be defeated.
|
|
|
|
After Mr. Passion has been defeated, take a quick rest on the couch to recover Duster's HP. Now enter the next room and get what you came here for: the Noble Spittoon.
|
|
|
|
Use the fireplace in the previous room to go straight to the first floor. Leave the castle and talk to the gravedigger. He'll give you the Drawbridge Key, which makes entering and leaving the castle easier. Return to Wess's House. Wess should be happy to see the Noble Spittoon. Right?
|
|
|

Stinky Ghost
|
|
Level:
HP:
PP:
Offense:
Defense:
IQ:
Speed:
|
14
125
0
48 [1]
10 [5]
18 [18]
22 [1]
|
|
NOTE: Lower number = strong, higher number = weak
Fire Def:
Ice Def:
Light. Def:
Bomb Def:
Poison:
Paral. Def:
Sleep Def:
Strange Def:
Cry Def:
Flammable:
Freezable:
DCMC Def:
Wall Staple:
Apologize:
Make Laugh:
|
120
80
100
100
0
0
80
60
10000
100
100
0
10000
20
70
|
|
|

Arachnid!
|
|
Level:
HP:
PP:
Offense:
Defense:
IQ:
Speed:
|
12
60
0
43 [1]
5 [1]
12 [12]
24 [1]
|
|
NOTE: Lower number = strong, higher number = weak
Fire Def:
Ice Def:
Light. Def:
Bomb Def:
Poison:
Paral. Def:
Sleep Def:
Strange Def:
Cry Def:
Flammable:
Freezable:
DCMC Def:
Wall Staple:
Apologize:
Make Laugh:
|
110
120
100
100
0
40
10000
60
80
100
100
0
75
20
70
|
|
|

Big Bro
|
|
Level:
HP:
PP:
Offense:
Defense:
IQ:
Speed:
|
12
67
0
10 [1]
13 [10]
30 [1]
28 [1]
|
|
NOTE: Lower number = strong, higher number = weak
Fire Def:
Ice Def:
Light. Def:
Bomb Def:
Poison:
Paral. Def:
Sleep Def:
Strange Def:
Cry Def:
Flammable:
Freezable:
DCMC Def:
Wall Staple:
Apologize:
Make Laugh:
|
50
100
100
100
0
60
10000
0
10000
100
100
0
75
20
70
|
|
|

Artsy Ghost
|
|
Level:
HP:
PP:
Offense:
Defense:
IQ:
Speed:
|
15
187
10
55 [1]
18 [13]
20 [20]
21 [1]
|
|
NOTE: Lower number = strong, higher number = weak
Fire Def:
Ice Def:
Light. Def:
Bomb Def:
Poison:
Paral. Def:
Sleep Def:
Strange Def:
Cry Def:
Flammable:
Freezable:
DCMC Def:
Wall Staple:
Apologize:
Make Laugh:
|
130
80
100
100
0
0
80
60
10000
100
100
0
10000
20
70
|
|
|

Carpet Monster
|
|
Level:
HP:
PP:
Offense:
Defense:
IQ:
Speed:
|
14
132
24
50 [1]
21 [3]
19 [19]
28 [1]
|
|
NOTE: Lower number = strong, higher number = weak
Fire Def:
Ice Def:
Light. Def:
Bomb Def:
Poison:
Paral. Def:
Sleep Def:
Strange Def:
Cry Def:
Flammable:
Freezable:
DCMC Def:
Wall Staple:
Apologize:
Make Laugh:
|
130
80
80
100
0
60
80
40
100
100
100
0
10000
20
70
|
|
|

Ghost Armor
|
|
Level:
HP:
PP:
Offense:
Defense:
IQ:
Speed:
|
14
141
0
47 [1]
30 [25]
18 [18]
5 [1]
|
|
NOTE: Lower number = strong, higher number = weak
Fire Def:
Ice Def:
Light. Def:
Bomb Def:
Poison:
Paral. Def:
Sleep Def:
Strange Def:
Cry Def:
Flammable:
Freezable:
DCMC Def:
Wall Staple:
Apologize:
Make Laugh:
|
10
70
125
120
0
0
100
40
0
0
100
0
30
20
70
|
|
|

Ghost Shield
|
|
Level:
HP:
PP:
Offense:
Defense:
IQ:
Speed:
|
14
124
14
45 [1]
33 [27]
17 [17]
10 [1]
|
|
NOTE: Lower number = strong, higher number = weak
Fire Def:
Ice Def:
Light. Def:
Bomb Def:
Poison:
Paral. Def:
Sleep Def:
Strange Def:
Cry Def:
Flammable:
Freezable:
DCMC Def:
Wall Staple:
Apologize:
Make Laugh:
|
10
70
125
120
0
0
100
40
0
0
100
0
30
20
70
|
|
|

Ghost Sword
|
|
Level:
HP:
PP:
Offense:
Defense:
IQ:
Speed:
|
14
108
12
57 [1]
24 [11]
15 [15]
26 [1]
|
|
NOTE: Lower number = strong, higher number = weak
Fire Def:
Ice Def:
Light. Def:
Bomb Def:
Poison:
Paral. Def:
Sleep Def:
Strange Def:
Cry Def:
Flammable:
Freezable:
DCMC Def:
Wall Staple:
Apologize:
Make Laugh:
|
10
70
125
120
0
0
100
40
0
0
100
0
30
20
70
|
|
|

Ghost Knight
|
|
Level:
HP:
PP:
Offense:
Defense:
IQ:
Speed:
|
20
200
20
68 [1]
36 [31]
22 [22]
5 [1]
|
|
NOTE: Lower number = strong, higher number = weak
Fire Def:
Ice Def:
Light. Def:
Bomb Def:
Poison:
Paral. Def:
Sleep Def:
Strange Def:
Cry Def:
Flammable:
Freezable:
DCMC Def:
Wall Staple:
Apologize:
Make Laugh:
|
10
70
125
100
0
0
80
40
0
0
100
0
30
20
70
|
|
Exp.:
DP:
Items:
|
180
0
Yogurt (70%)
|
|

Strawberry Slime
|
|
Level:
HP:
PP:
Offense:
Defense:
IQ:
Speed:
|
14
182
0
52 [1]
30 [8]
20 [20]
5 [1]
|
|
NOTE: Lower number = strong, higher number = weak
Fire Def:
Ice Def:
Light. Def:
Bomb Def:
Poison:
Paral. Def:
Sleep Def:
Strange Def:
Cry Def:
Flammable:
Freezable:
DCMC Def:
Wall Staple:
Apologize:
Make Laugh:
|
80
120
50
100
0
0
60
40
100
100
100
0
0
20
70
|
|
|

Violent Roach
|
|
Level:
HP:
PP:
Offense:
Defense:
IQ:
Speed:
|
14
88
0
55 [1]
11 [6]
18 [18]
35 [1]
|
|
NOTE: Lower number = strong, higher number = weak
Fire Def:
Ice Def:
Light. Def:
Bomb Def:
Poison:
Paral. Def:
Sleep Def:
Strange Def:
Cry Def:
Flammable:
Freezable:
DCMC Def:
Wall Staple:
Apologize:
Make Laugh:
|
110
120
100
100
0
60
10000
60
80
100
100
0
75
20
70
|
|
|

Rockin' Ghost
|
|
Level:
HP:
PP:
Offense:
Defense:
IQ:
Speed:
|
16
152
0
54 [1]
24 [15]
20 [20]
23 [1]
|
|
NOTE: Lower number = strong, higher number = weak
Fire Def:
Ice Def:
Light. Def:
Bomb Def:
Poison:
Paral. Def:
Sleep Def:
Strange Def:
Cry Def:
Flammable:
Freezable:
DCMC Def:
Wall Staple:
Apologize:
Make Laugh:
|
120
80
80
100
0
0
80
40
10000
100
100
0
75
20
70
|
|
|

Pseudoor
|
|
Level:
HP:
PP:
Offense:
Defense:
IQ:
Speed:
|
16
215
0
58 [1]
27 [40]
12 [12]
18 [1]
|
|
NOTE: Lower number = strong, higher number = weak
Fire Def:
Ice Def:
Light. Def:
Bomb Def:
Poison:
Paral. Def:
Sleep Def:
Strange Def:
Cry Def:
Flammable:
Freezable:
DCMC Def:
Wall Staple:
Apologize:
Make Laugh:
|
120
50
80
120
0
0
80
40
10000
100
100
0
50
20
70
|
|
|

Barrel Man
|
|
Level:
HP:
PP:
Offense:
Defense:
IQ:
Speed:
|
14
100
0
50 [1]
18 [12]
17 [17]
15 [1]
|
|
NOTE: Lower number = strong, higher number = weak
Fire Def:
Ice Def:
Light. Def:
Bomb Def:
Poison:
Paral. Def:
Sleep Def:
Strange Def:
Cry Def:
Flammable:
Freezable:
DCMC Def:
Wall Staple:
Apologize:
Make Laugh:
|
120
80
100
100
0
60
80
60
10000
100
100
0
75
20
70
|
|
|


