SCENE 11 - HAPPY PERFORMANCE
Location: Tazmily Village
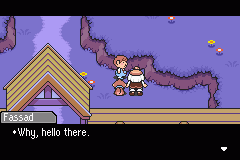
| Walk into town. You'll come across Butch standing next to a bag full of money. After a short conversation, Fassad bumps into Duster. Butch later hides the bag of money in the well, and tells Duster to keep it a secret. But Fassad was listening the whole time. Now head to the Yado Inn. |
|
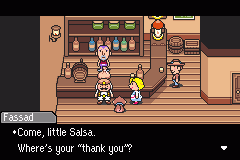
| Talk to the woman behind the counter for a room. Fassad thanks her with a bag of money and Salsa thanks her with a dance. Sort of. Now go to the middle room to get some needed sleep. |
|
| In the middle of the night, Fassad will leave Salsa alone in the room. Save with the frog and leave the inn. Outside, you'll overhear Fassad talking on his trasceiver about the Pigmask invasion of Osohe Castle. You can now go north and get punished, or hurry back to the room. |

|
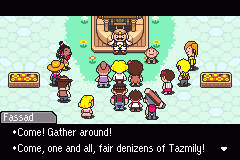
| In the morning, you're woken by yet another zap of electricity. Salsa performs his tricks out in the town square, but this time in front of an audience. You'll then have to talk to several people and get their names. After this, it's back to the inn once more. |
|
| Inside your room, Fassad will make a call. Seems someone is having trouble finding "it". Fassad tells Salsa to make deliveries to everyone who raised their hand during his speech. Answer "Yes" to agree with him. Save and then leave the inn, as it's time to make those deliveries. |
|
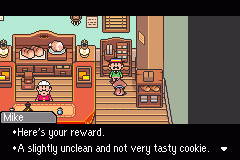
 At this point, you can walk around and explore many places. You can also get free food from several Tazmily citizens by performing some of your monkey tricks for them.
|
|
|
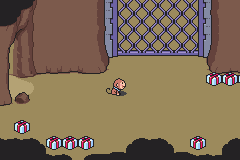
The strange, sealed cave on the eastern end of Cross Road is now open. Inside, you'll find many gift boxes with simple food items. Stock up if you feel the need to. This is your only chance to gets these items; the boxes will be emptied before too long.
|
|
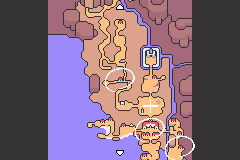
| After you've explored the town with your new-found freedom, go to the cemetery. Here are the Happy Boxes you need to deliver to Abbot, Abbey, Biff, and Isaac. Talk to Mapson nearby and he'll mark their locations on your map. |
|
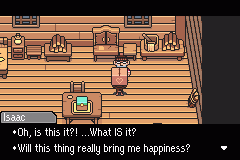
| You can deliver the boxes in any order you want, but this is the recommended order. First up is Isaac, who lives in the forest, near the hot spring. After receiving the free Happy Box, Isaac is spellbound by Fassad's generosity. |
|
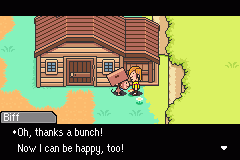
| The next delivery is to Biff, in the farm area southeast of town. |
|
| Next is a delivery to Abbot and Abbey, who live in the central area of Tazmily. They both ordered a box, but they only need one, so they cancel the other order. You've finished delivering all the Happy Boxes! |

|
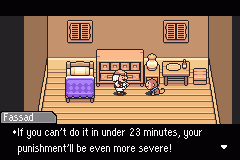
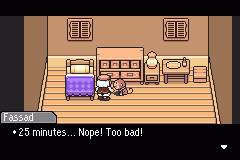
| Return to Fassad's room in the Yado Inn. No matter how fast your deliveries were, he'll always say you weren't fast enough and punish you. Once he's had his laughs, he'll tell you to head to Osohe Castle. |
|
ITEMS LOCATED HERE:
 Nut ナッツ |
Description: HP-recovering food. | |
|
Buy Price: 2 DP Sell Price: - DP |
Recovers about 5HP
|
|
 Nut Bread このみパン |
Description: HP-recovering food. | |
|
Buy Price: 12 DP Sell Price: - DP |
Recovers about 30HP
|
|
 Rotten Milk ふるいミルク |
Description: HP-recovering food. | |
|
Buy Price: 6 DP Sell Price: - DP |
Recovers about 10HP
|
|
ENEMIES LOCATED HERE:
 Greedy Mouse |
|
|||||||
|
NOTE: Lower number = strong, higher number = weak
|
|
||||||
 Praying Mantis |
|
|||||||
|
NOTE: Lower number = strong, higher number = weak
|
|
||||||


Ch. 3: The Secret Path | Mother 3 Walkthrough Top | Ch. 3: Osohe, Again