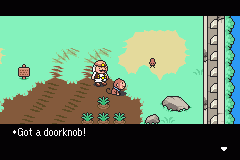
 The doorknob from Flint's door makes another cameo! This time it's somehow found itself into Nippolyte's vegetable patch in front of Osohe Castle. Fassad doesn't seem too fond of doorknobs, however.
|
|
|
|
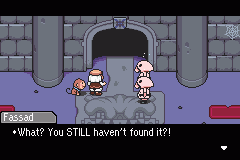
By now you should know how to get to Osohe Castle. Talk to the Pigmasks inside about their failure to find "it" and their encounters with Duster and Wess. Now head all the way to the ghosts' party room. Go upstairs and examine the gap in the floor. Go back downstairs and try to leave the party room. Fassad will receive word that Duster and company have escaped into the basement with "it".
|
|
|
|
You can actually skip most of the above. After you enter the castle and talk to the Pigmasks, Fassad will get the call about Duster and company escaping if you try to leave the castle.
|
|
|
|
Go back to the room on the first floor with three doors. Take the right door and go into the basement. Cross the tiny bridge and go down the hall. Don't mind the weak enemies here.
|
|
|
|
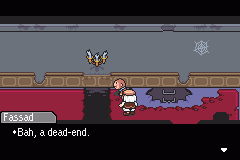
When you get to the dead-end, Fassad tells Salsa to open the door somehow. Check the three patterns on the wall, then check the stone face door. Salsa will do the same dance that Wess did earlier, which will open the way. After your "reward", be sure to save with the spooky ghost frog and then climb down the ladder.
|

|
|
|
You're now in the lowest depths of the castle. Be sure to grab the Pisces Bracelet from the nearby gift box. Continue on and and you'll find another box with some Beef Jerky inside.
|

|
|
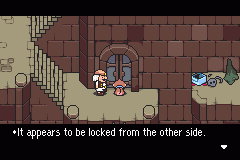
 There's a door right by the ladder. It doesn't seem to budge, though. Remember this door for later. Much later. Just how big is this castle anyway?
|
|
|
|
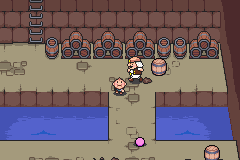
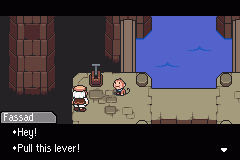
Head right to get an Ancient Banana from a gift box, and then back left to get another Beef Jerky. Continue left and you'll come to a lever. Pulling it will cause Duster, Kumatora, and Wess to plunge down a stream of water right in front of you. Some Pigmasks enter to let you know that they've just escaped with "it". There's nothing more to do here, so leave the castle.
|
|
|
|
Once outside, Fassad will make the Pigmasks move their tanks. Head back to town. When you reach the plaza, there'll be a group of people crowded around Kumatora and Wess. Butch accuses Duster of stealing the bag of money from before. Fassad acts innocently while Salsa and Kumatora exchange looks. You return to your room at the inn where you spend yet another night.
|

|
|
|
Salsa is woken by Kumatora and Wess whispering at the window. Don't try and leave via the door, as you'll just get shocked. Go to the window and escape. The three run to the plaza. Wess leaves and returns with the remote that has caused Salsa so much pain. After Salsa destroys the remote, an interruption arrives.
|
|
|
|
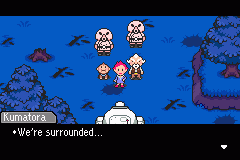
Fassad has discovered that Salsa has escaped. Run into the forest, and prepare for a tough battle coming up. Run north through the woods fighting off any enemies that get in your way. Soon you'll be blocked by a tank. Continue north, only to be stopped by a second tank. Head back south and another tank appears. Looks like you'll have to fight!
|
|
|
|
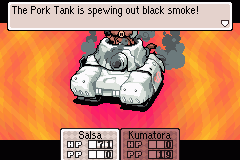
This tank means business. Have Kumatora constantly use PK Thunder α and have Salsa use bombs and Ancient Bananas. Monkey Mimic can also be helpful. Always have Salsa use healing items when needed and only use Kumatora's Lifeup α when it's absolutely necessary. This battle has two phases, so when the tank starts to break down you know you've almost won.
|
|
|
|
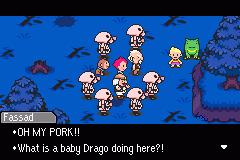
Once the tank is destroyed, the Pigmasks are too scared to fight. Fassad enters, and it looks like our heros are doomed. Suddenly, Lucas and a Drago child show up. The Drago child calls for its parent, who gets rid of Fassad and the Pigmasks. The heroes meet, and everything is explained to Lucas. Kumatora and Salsa leave. The chapter comes to an end.
|
|
|

Barrel Man
|
|
Level:
HP:
PP:
Offense:
Defense:
IQ:
Speed:
|
14
100
0
50 [1]
18 [12]
17 [17]
15 [1]
|
|
NOTE: Lower number = strong, higher number = weak
Fire Def:
Ice Def:
Light. Def:
Bomb Def:
Poison:
Paral. Def:
Sleep Def:
Strange Def:
Cry Def:
Flammable:
Freezable:
DCMC Def:
Wall Staple:
Apologize:
Make Laugh:
|
120
80
100
100
0
60
80
60
10000
100
100
0
75
20
70
|
|
|

Big Bro
|
|
Level:
HP:
PP:
Offense:
Defense:
IQ:
Speed:
|
12
67
0
10 [1]
13 [10]
30 [1]
28 [1]
|
|
NOTE: Lower number = strong, higher number = weak
Fire Def:
Ice Def:
Light. Def:
Bomb Def:
Poison:
Paral. Def:
Sleep Def:
Strange Def:
Cry Def:
Flammable:
Freezable:
DCMC Def:
Wall Staple:
Apologize:
Make Laugh:
|
50
100
100
100
0
60
10000
0
10000
100
100
0
75
20
70
|
|
|

Cheery Skeleton
|
|
Level:
HP:
PP:
Offense:
Defense:
IQ:
Speed:
|
14
109
0
45 [1]
16 [11]
12 [5]
20 [1]
|
|
NOTE: Lower number = strong, higher number = weak
Fire Def:
Ice Def:
Light. Def:
Bomb Def:
Poison:
Paral. Def:
Sleep Def:
Strange Def:
Cry Def:
Flammable:
Freezable:
DCMC Def:
Wall Staple:
Apologize:
Make Laugh:
|
150
100
100
100
0
0
80
60
0
100
100
0
70
50
100
|
|
|

Li'l Big Bro
|
|
Level:
HP:
PP:
Offense:
Defense:
IQ:
Speed:
|
14
138
0
47 [1]
20 [1]
15 [11]
12 [1]
|
|
NOTE: Lower number = strong, higher number = weak
Fire Def:
Ice Def:
Light. Def:
Bomb Def:
Poison:
Paral. Def:
Sleep Def:
Strange Def:
Cry Def:
Flammable:
Freezable:
DCMC Def:
Wall Staple:
Apologize:
Make Laugh:
|
50
130
100
100
0
40
60
60
10000
100
100
0
75
30
80
|
|
|

Pigmask
|
|
Level:
HP:
PP:
Offense:
Defense:
IQ:
Speed:
|
18
160
0
55 [1]
20 [15]
10 [22]
23 [1]
|
|
NOTE: Lower number = strong, higher number = weak
Fire Def:
Ice Def:
Light. Def:
Bomb Def:
Poison:
Paral. Def:
Sleep Def:
Strange Def:
Cry Def:
Flammable:
Freezable:
DCMC Def:
Wall Staple:
Apologize:
Make Laugh:
|
100
120
90
120
0
60
100
60
80
100
100
10000
75
20
70
|
|
|

Recon Mech
|
|
Level:
HP:
PP:
Offense:
Defense:
IQ:
Speed:
|
18
90
0
50 [1]
35 [29]
20 [34]
20 [1]
|
|
NOTE: Lower number = strong, higher number = weak
Fire Def:
Ice Def:
Light. Def:
Bomb Def:
Poison:
Paral. Def:
Sleep Def:
Strange Def:
Cry Def:
Flammable:
Freezable:
DCMC Def:
Wall Staple:
Apologize:
Make Laugh:
|
80
80
120
100
0
0
0
80
0
100
0
0
50
20
70
|
|
|


