SCENE 15 - GET A JOB
Location: Factory
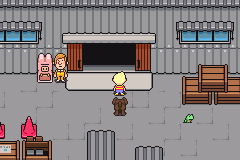
| There is a very large factory standing before you, but don't worry about that just now. Check the nearby vending machine if you would like to purchase any items. You can save with the Save Frog. And Item Guy is also here, so if you want to store any items now is the time. There is a gift box in the northeast corner that holds Eyedrops. Go north to the forest. |
|
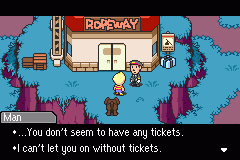
| Here you will find the Ropeway, which is the only way to get to Club Titiboo. However, after a short conversation you find out that only employees of Corva can go there. Grab the Local Area Map from the present box on the right and head back to Corva to get a job. |
|
| You may have noticed that there are paths on the west and east side of this forest. The west path has some strong enemies and leads to a strange zoo, a hot spring, some gift boxes, and a dead end. The east path leads to a waterfall and another dead end. Don't mind these paths just yet, as they will be covered in upcoming chapters. |
|
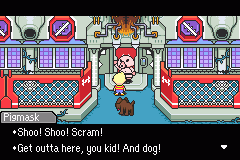
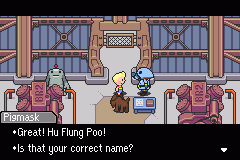
| Go inside Corva and speak to the blue Pigmask. He will offer you a job recharging Claymen. Say "Yes" to his offer and he will give you a Corva Sketch. He will also ask for the name of the player, which is YOU! Write your name down here. After confirming it, Boney will leave your party for awhile. Head towards the back room and climb down the ladder. |
|
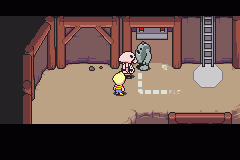
| At the bottom of the ladder is a Pigmask who is in charge of the elevator shaft. You have to explore this mine and find weak looking Claymen. Once you find one, push him all the way back to this Pigmask. He will lower the elevator and bring the weak Clayman to the top. Go back up the ladder and continue to push the Clayman into the next room where he will be recharged. You need to do this a total of 3 times. |
|
| Once you are finished, talk to the blue Pigmask. He will give you a Ticket for the Ropeway and 200DP. Boney rejoins you as well. Head outside, save with the Save Frog, and go back to the Ropeway. Give your Ticket to the guy at the Ropeway and you will travel all the way up to the conveniently located Club Titiboo. |

|
ITEMS LOCATED HERE:
 Area Map このへんのちず |
Description: Key item. | |
|
Buy Price: - DP Sell Price: - DP |
|
|
 Eye Drops めぐすり |
Description: Status recovery item. | |
|
Buy Price: 10 DP Sell Price: - DP |
Cures Crying
|
|
 Factory Sketch コーバみとりず |
Description: Key item. | |
|
Buy Price: - DP Sell Price: - DP |
|
|
 Magic Tart マジックタルト |
Description: PP-recovering food. | |
|
Buy Price: 300 DP Sell Price: - DP |
Recovers about 30PP
|
|
 Saltwater Gun シオミズデッポウ |
Description: Battle item. | |
|
Buy Price: 400 DP Sell Price: - DP |
|
|
 Ticket チケット |
Description: Key item. | |
|
Buy Price: - DP Sell Price: - DP |
|
|
ENEMIES LOCATED HERE:
 Pigtunia |
|
|||||||
|
NOTE: Lower number = strong, higher number = weak
|
|
||||||
 Batangutan |
|
|||||||
|
NOTE: Lower number = strong, higher number = weak
|
|
||||||
 Reconstructed Mole |
|
|||||||
|
NOTE: Lower number = strong, higher number = weak
|
|
||||||
 Squawking Stick |
|
|||||||
|
NOTE: Lower number = strong, higher number = weak
|
|
||||||
 Cattlesnake |
|
|||||||
|
NOTE: Lower number = strong, higher number = weak
|
|
||||||
 Ostrelephant |
|
|||||||
|
NOTE: Lower number = strong, higher number = weak
|
|
||||||


Ch. 4: Beware of Trains | Mother 3 Walkthrough Top | Ch. 4: No Dogs Allowed