SCENE 22 - THE CHIMERA LAB
Location: Chimera Laboratory
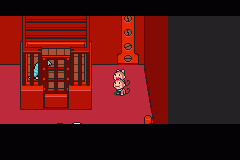
| The Pigmask guard recognizes you as the part-time worker from the day before. He has to leave to look for an escaped monkey. You can easily get into the lab now. Once inside, you can go to the menĺs bathroom on the left and find a Save Frog, or head into the mini-theater on the right. |
|
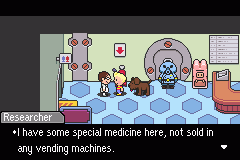
 The doctor in the lobby sells some pretty strong experimental medicine! These items can help make you stronger and your enemy weaker. But they come at an expensive DP cost.
|
|
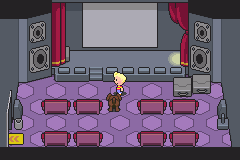
| In the theater go on stage and through the light to the locker room. Check the open locker and put on the pig masks. Go into the next empty room and head up the stairs and walkthrough the room full of AV equipment. In the next room open the blue present in the corner for the Chimera Lab map. Go through the nearby door. |

|
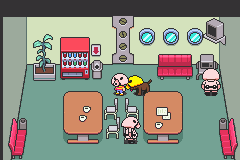
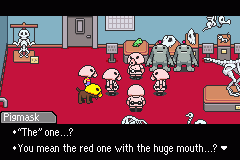
| You will be spotted by a Pigmask. He wants you to help look for two escaped monkeys. The room right in front of you is the break room and has a vending machine that sells Big City Cola. Enter the room on the left and you will see a garbage can running away. |
|
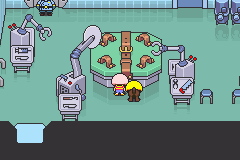
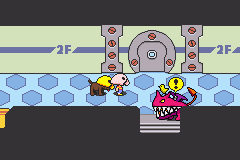
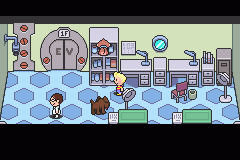
| There are many rooms in the lab, most of which are empty. But some are worth checking out for presents or information about the lab. On the first floor to the left is a big operating room. In south connecting room is a frozen Drago and a present with a Bomb inside. Back in the hall, the second room on the right you will find a working projector and a present with a Saltwater Gun. On the second floor you can find a Secret Herb in the room with the parrot, a sauna, and a magic buttery fly in the microscope in the first lab on the south wall. And finally if you take an elevator to the third floor you can find an Edible Mushroom and an Enemy Wimperizer in the lockers and a Made-U-Look in the last crate. |
|
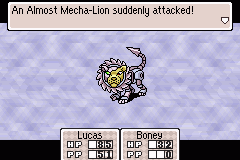
| At the end of the hallway on the second floor is a museum full of chimeras. You can save with the stuffed Save Frog here if you like. Go through the north door into the stuffed chimera room, and go trough the next door as well. There in the brain room you will find the two escaped monkeys. They will quickly run away if approached. Follow them but be ready for a fight. As soon as you go back into the skeleton part of the museum you will be attacked by an Almost Mecha-Lion. |
|
| You may think you have won the fight, but the Almost Mecha-Lion doesnĺt want to stay down. As he is about to lung for you a Clayman saves the day. It seems that some Chimeras have escaped the Pigmasks are trying to round them up. Only one remains: The Ultimate Chimera. Now would be a good time to use that nearby by Save Frog. |
|
|
While walking the lab halls you may be unfortunate enough to run into the Ultimate Chimera. If he catches you then Lucas and Boney will be forced into a fight that they cannot win and then itĺs game over. Just run to the nearest room or elevator when you see the Ultimate Chimera.
|
|
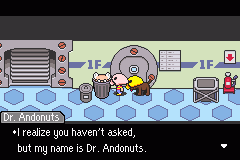
| On the first or second floor after looking in a few rooms a trashcan will appear in the hall. This was the same one that ran away from you before! Inside is none other then Dr. Andonuts. He canĺt do much for you now, so leave him be. |
|
| The monkeys have gone into the labs basement. The only way down is from the elevator in the operating room on the first floor. The Pigmask guarding the door has no problem with you taking the elevator. Once in the basement just keep going until you find the monkeys in the red room. They will once again run away. Head back to the elevator. You can also find a Pork Stew inside the opened cage. |
|
| From the operating room go back to the first floor hallway. The monkeys havenĺt gotten very far as you spot them right at the door. Follow them for the last time to the room at the far end of the hall. But you will have the Ultimate Chimera as company! Dr. Andonuts musters enough courage to appear and tell you that the only way to stop the Ultimate Chimera is to turn its switch to ôOFF.ö Easier said then done as now Lucas and Boney are being chased! Salsa remembers how Lucas helped him all those years ago in Sunshine Forest. He quickly races to help Lucas and Boney and turns off the Ultimate Chimera in the nick of time. Salsa joins you. It is finally time to leave this lab of horrors. |

|
|
Go back into the Chimera Lab to find some hidden items. Head to the first lab room on the left on the first floor. You can have Salsa get you a Offense Spray from the shelf. On the second floor in the first lab on the south wall (same place where you found the Magic Butterfly) you can have Salsa get you a Can of Bug Spray and a Defense Spray from the shelves. In the Chimera museum a doctor will give you an Enemy Bufferizer.
|
|
ITEMS LOCATED HERE:
 Bomb ŃâťŃâá |
Description: Battle item. | |
|
Buy Price: 1000 DP Sell Price: - DP |
|
|
 Saltwater Gun ŃéĚŃé¬ŃâčŃé║ŃâçŃââŃâŁŃéŽ |
Description: Battle item. | |
|
Buy Price: 400 DP Sell Price: - DP |
|
|
 Secret Herb ŃüćŃéëŃéźŃâ│ŃâŁŃâ╝ |
Description: Status recovery item. | |
|
Buy Price: 600 DP Sell Price: - DP |
Cures all status ailments and brings one character back to life with 25% HP
|
|
 Edible Mushroom ŃüčŃü╣ŃéëŃéîŃéőŃéşŃâÄŃé│ |
Description: HP-recovering food. | |
|
Buy Price: 10 DP Sell Price: - DP |
Recovers about 20HP
|
|
 Enemy Wimperizer ŃâćŃéşŃâĘŃâ»ŃâíŃâčŃâ│ |
Description: Battle item. | |
|
Buy Price: 1200 DP Sell Price: - DP |
|
|
 Made-You-Look ŃâÉŃéźŃéČŃâčŃâ╝Ńâź |
Description: Battle item. | |
|
Buy Price: 50 DP Sell Price: - DP |
|
|
 Pork Stew ŃüĘŃéôŃüőŃüúŃüíŃéâŃéô |
Description: HP-recovering food. | |
|
Buy Price: 120 DP Sell Price: - DP |
Recovers about 100HP
|
|
 Offense Spray ŃâäŃâĘŃâíŃâ¬Ńâ│ |
Description: Battle item. | |
|
Buy Price: 1000 DP Sell Price: - DP |
|
|
 Bug Spray ŃâáŃéĚŃâáŃéĚŃéşŃâęŃâ╝ |
Description: Battle item. | |
|
Buy Price: 100 DP Sell Price: - DP |
Exterminates a single insect enemy.
|
|
 Defense Spray Ńâ×ŃâóŃâ¬Ńâ│ |
Description: Battle item. | |
|
Buy Price: 1000 DP Sell Price: - DP |
|
|
 Enemy Bufferizer ŃâćŃéşŃâäŃâĘŃâíŃâčŃâ│ |
Description: Battle item. | |
|
Buy Price: 800 DP Sell Price: - DP |
|
|
ENEMIES LOCATED HERE:
 Bro Team |
|
|||||||
|
NOTE: Lower number = strong, higher number = weak
|
|
||||||
 Squawking Boomstick |
|
|||||||
|
NOTE: Lower number = strong, higher number = weak
|
|
||||||
 Cattlesnake |
|
|||||||
|
NOTE: Lower number = strong, higher number = weak
|
|
||||||
 Ostrelephant |
|
|||||||
|
NOTE: Lower number = strong, higher number = weak
|
|
||||||
 Horsantula |
|
|||||||
|
NOTE: Lower number = strong, higher number = weak
|
|
||||||
 Einswine |
|
|||||||
|
NOTE: Lower number = strong, higher number = weak
|
|
||||||


BOSSES LOCATED HERE:
 Almost Mecha-Lion |
|
|||||||
|
NOTE: Lower number = strong, higher number = weak
|
|
||||||

Ch. 7: The Needles | Mother 3 Walkthrough Top | Ch. 7: Mole Crickets