SCENE 32 - TO THE 100TH FLOOR
Location: Empire Porky Building
 If you check the giant statue of Porky, you can now return itĺs hostile feelings. The statue is very much alive and ready to kick butt. With its HP reaching 100,000,000 taking him down normally will take quite awhile. For a much faster win, speak to the Pigmask that sells explosives, located down the nearby ladder. Purchase the New Yearĺs Eve bomb and use it on the statue to quickly turn it into rubble. Speak to the nearby man for the Trivia Card 4.
|

|
| The trip through the enormous Empire Porky Building will be a long one. Be sure to purchase any items you want now before you venture inside. When ready, enter the building and go to the elevator in the room on the left. |

|
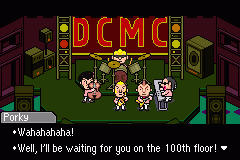
| The elevator can only take you to the 24th floor. This happens to be the same floor the DCMC concert is being held. Head to the concert hall and reunite Duster, or rather Lucky, with the DCMC. When in control of Duster, walk up to the afro wig and put it on. Time to jam. |

|
| The DCMC take the stage and own it. However the concert is cut short by a mysterious voice. You are beckoned to the 100th floor for a meeting. Head to the elevator and ride it to the next floor. |
|
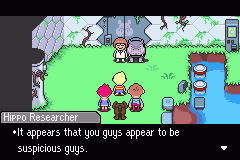
| This isnĺt the 100th floor, in fact its no where close to it. Walk through the Hippo Launchers wadding pools and head east. You will come across a present with a Super Bomb inside. Head north and then hop out of the water. A Hippo Researcher will think you are being suspicious and sick a Hippo Launcher on you! After the fight head south and grab the Ultimate Shoes from the present. Head back and go through the door. |
|
| Go east and jump back into the wadding pool. Go west and you will find presents with Grilled Chicken and a Cup of Lifenoodles inside. Take the nearby elevator to the next floor. |

|
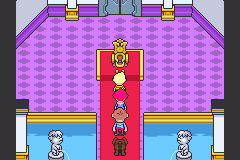
| Again, this isnĺt the 100th floor but Master Porkyĺs throne room. Just pass on through and take the next elevator. |

|
| This is the bathroom floor. The third door holds a present with an Attack Attractor and the last door leads to the next hall. The last door contains a Honey Shower, but you will have to get past the Menĺs Room Sign first. The third door leads to another hall with even more bathrooms. |

|
| Take the last door on the left to get to yet another hall. The third door on the right has a Pigmask Major inside and a present with a Red Collar. The fourth door goes to yet another hallway of bathrooms. Nothing much in this hall but a Save Frog. Take the last door on the left. The third door on the right leads to a giant door that takes you out of this bathroom maze. Ride the elevator inside. |
|
|
In the final bathroom hallway, the last door on the right has a dangerous occupant. Knock on the door once for a familiar sound. Knock on it again for an angry response. Go through the door and you will be greeted by the Ultimate Chimera! Youĺll see a present lying next to him but donĺt go for it! Instead, run out of the room and go in the door on the left. Now quickly run back to the hall and make a mad dash for the busted down bathroom door on the right. Open the present and get an Awesome Ring. Run back out of this room and through the door on the left. Remember, getting caught by the Ultimate Chimera means game over!
|

|
| This floor containsů A Magypsy shell house? Inside you will find six presents with Luxury Bananas and Locriaĺs Memento. Was Fassad the missing Magypsy? Take the elevator located east to the largest floor youĺve reach so far. |

|
ITEMS LOCATED HERE:
 Trivia Card 4 Ńü¬Ńü×Ńü¬Ńü×ŃéźŃâ╝Ńâë´╝ö |
Description: Battle item. | |
|
Buy Price: 0 DP Sell Price: - DP |
|
|
 Super Bomb Ńé╣Ńâ╝ŃâĹŃâ╝ŃâťŃâá |
Description: Battle item. | |
|
Buy Price: 2000 DP Sell Price: - DP |
|
|
 Ultimate Shoes ŃüĽŃüäŃüôŃüćŃü«ŃüĆŃüĄ |
Description: A weapon for Duster. | |
|
Buy Price: 2000 DP Sell Price: - DP |
Offense +82
|
|
 Grilled Chicken ŃüĘŃéŐŃü«ŃâśŃâźŃéĚŃâ╝ŃéäŃüŹ |
Description: HP-recovering food. | |
|
Buy Price: 300 DP Sell Price: - DP |
Recovers about 170HP
|
|
 Cup of Lifenoodles ŃüäŃü«ŃüíŃü«ŃüćŃüęŃéô |
Description: Status recovery item. | |
|
Buy Price: 1780 DP Sell Price: - DP |
Cures all status ailments and brings one character back to life with full HP
|
|
 Attack Attractor ŃüôŃüćŃüĺŃüŹŃâŤŃéĄŃâŤŃéĄ |
Description: Battle item. | |
|
Buy Price: 400 DP Sell Price: - DP |
|
|
 Honey Shower Ńü»ŃüíŃü┐ŃüĄŃéĚŃâúŃâ»Ńâ╝ |
Description: Battle item. | |
|
Buy Price: 300 DP Sell Price: - DP |
|
|
 Red Collar ŃüéŃüőŃü«ŃüĆŃü│ŃéĆ |
Description: Body gear for Boney. | |
|
Buy Price: 4600 DP Sell Price: - DP |
Defense +50
Offense +50 |
|
 Awesome Ring ŃüÖŃüúŃüöŃüäŃâ¬Ńâ│Ńé░ |
Description: Accessory for Lucas. | |
|
Buy Price: 4800 DP Sell Price: - DP |
Defense +30
PP +30 |
|
 Luxury Banana ŃüôŃüćŃüŹŃéůŃüćŃâÉŃâŐŃâŐ |
Description: HP-recovering food. | |
|
Buy Price: 500 DP Sell Price: - DP |
Recovers about 120HP
|
|
 Razor and Lipstick ŃâĺŃé▓ŃüŁŃéŐŃüĘŃüĆŃüíŃü╣Ńüź |
Description: Status recovery item. | |
|
Buy Price: 0 DP Sell Price: - DP |
Instant revival after KO
|
|
ENEMIES LOCATED HERE:
 Hippo Launcher [1] |
|
|||||||
|
NOTE: Lower number = strong, higher number = weak
|
|
||||||
 Hippo Launcher [2] |
|
|||||||
|
NOTE: Lower number = strong, higher number = weak
|
|
||||||
 Pigmask Major [2] |
|
|||||||
|
NOTE: Lower number = strong, higher number = weak
|
|
||||||
 Metal Attack Roach |
|
|||||||
|
NOTE: Lower number = strong, higher number = weak
|
|
||||||
 Men's Room Sign |
|
|||||||
|
NOTE: Lower number = strong, higher number = weak
|
|
||||||


Ch. 8: Eye-Opening Sewers | Mother 3 Walkthrough Top | Ch. 8: Almost There