SCENE 13 - THE ADVENTURE BEGINS
Location: Tazmily Village
| Three years have passed since the last chapter ended. Tazmily Village has changed a lot in that time. Lucas has as well, as he is a bit older and taller now. When he wakes up, head downstairs and you'll have a flashback. Check the mirror for another flashback. Now leave the house. |
|
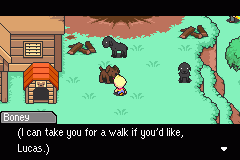
| Once outside, walk towards the animals. Boney will come running up and join you. This faithful canine will be a great ally on your journey. Head into town. |
|
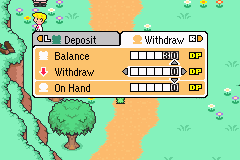
 You'll soon come across a Save Frog. Talk to him and he'll explain the game's currency, which is called "DP". You might have noticed that DP is now listed in your menu. You can now buy and sell items and enemies will drop DP. You can also deposit and withdraw DP from Save Frogs as if they were little green ATMs.
|
|
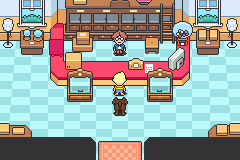
| Tazmily Village has changed a lot in such a short time. All the buildings have changed and there are now roads. The town's layout is pretty much the same as before. Now's a good time to just explore and talk to everyone. You don't have much money just yet, but be sure to come back to Thomas's Shop later. |
|
|
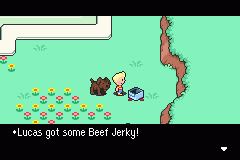
You can find some gift boxes throughout town. Trivia Card 1 can be found in the hotel. Dolphin Ossicles can be found at the beach and always respawn. In the train station area you can find a Bread Roll, a Sprinting Bomb, and some Beef Jerky.
|
|
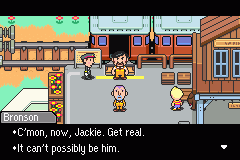
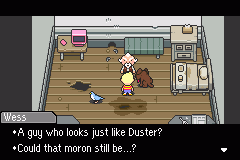
| It looks like a new train station was built over the old dirt crossroads. Go to the platform and talk to Bronson after he gets off the train. It seems Duster is still missing and that someone at Club Titiboo looks just like him... You can't a ride on the train just now, so head north again to the cemetery. |
|
|
You'll find the Item Guy southwest of the station. Whenever you want to store an item away, talk to him and he'll take care of it for you free of charge.
|
|
| Once in the cemetery, head to Hinawa's grave. Speak to Flint, and you'll have another flashback. Once it's over, head back to town. |
|
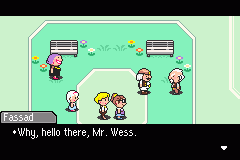
| Back in town, Fassad and Wess will have an argument about all the recent lightning, and Wess will be taken back to his house - which is now a retirement home - by force. |
|
| Go tell Wess about the man who looks like Duster. He'll ask you to go to Club Titiboo to see if it really is Duster. While you're here, talk to Mike to earn 50 DP. |
|
|
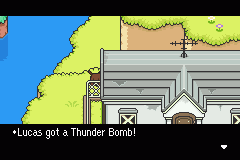
As always, you can check behind the retirement home for a Thunder Bomb. Grab some for the long journey ahead. Give them to Boney as he'll be your weakest member for a while.
|
|
|
If you want to buy some things from Thomas's Shop you will need more DP. Head to the Sunshine Forest and fight some Slitherhens. When you feel you've whacked enough chicken, go and find a Save Frog and withdraw your DP. Purchase a Kid's Shirt and Pisces Bracelet for Lucas, and a Kid's Hat for both Lucas and Boney.
|
|
|
Actually, you can buy a Pisces Bracelet from Thomas, or you can get a free one if you journey into the Sunshine Forest. Behind a Grated Yammonster is a hidden gift box with a bracelet. Grated Yammonsters don't move, so you don't even need to fight it. Free equipment, hurray!
|
|
| Now head inside the train tunnel. A man will stop you just as you're about to enter. After a lecture on watching out for trains, he'll give you the Railway Map. Head into the tunnel. |
|
ITEMS LOCATED HERE:
 Beef Jerky ほしにく |
Description: HP-recovering food. | |
|
Buy Price: 26 DP Sell Price: - DP |
Recovers about 60HP
|
|
 Bread Roll ロールパン |
Description: HP-recovering food. | |
|
Buy Price: 30 DP Sell Price: - DP |
Recovers about 60HP
|
|
 Dolphin Ossicle イルカのじこつ |
Description: A fossilized dolphin ear bone. Sell it for easy money. | |
|
Buy Price: - DP Sell Price: 5 DP |
|
|
 Peculiar Cheese クセのあるチーズ |
Description: HP-recovering food. | |
|
Buy Price: 20 DP Sell Price: - DP |
HP-recovering varies by person
|
|
 Pisces Bracelet うおのうでわ |
Description: Accessory for Flint, Lucas, Duster, Kumatora, and Salsa. | |
|
Buy Price: 160 DP Sell Price: - DP |
Defense +7
|
|
 Railway Map ろせんず |
Description: Key item. | |
|
Buy Price: - DP Sell Price: - DP |
|
|
 Sprinting Bomb ばしりだま |
Description: Battle item. | |
|
Buy Price: 200 DP Sell Price: - DP |
|
|
 Thunder Bomb イカヅチだま |
Description: Battle item. | |
|
Buy Price: 50 DP Sell Price: - DP |
|
|
 Trivia Card 1 なぞなぞカード1 |
Description: Battle item. | |
|
Buy Price: 0 DP Sell Price: - DP |
|
|
ENEMIES LOCATED HERE:
 Slitherhen |
|
|||||||
|
NOTE: Lower number = strong, higher number = weak
|
|
||||||
 Really Flying Mouse |
|
|||||||
|
NOTE: Lower number = strong, higher number = weak
|
|
||||||
 Grated Yammonster |
|
|||||||
|
NOTE: Lower number = strong, higher number = weak
|
|
||||||


Ch. 3: Osohe, Again | Mother 3 Walkthrough Top | Ch. 4: Beware of Trains